Basic Ray Tracer with Spheres and Triangle Meshes
April 2020 (538 Words, 3 Minutes)
Required images
The assignment did not require any specific references to the code-base to appear in the README document. Should you like to look at the code in more depth, it is available here in my gitlab.
That gitlab also holds the code for this website, the C++ is in the src/ directory.
Supertoroid and Spheres
This image is intended to match the requirements of a mesh and spheres as stated in the assignment.
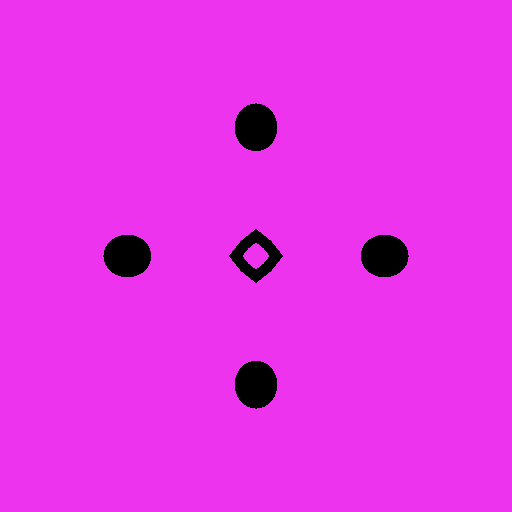
Here it is! this image contains 4 spheres placed along the x and y axis equidistant from the origin, as well as the supertoroid smf file, placed at the origin, rotated 45 degrees.
The image is 512x512 and the ray tracing section (excluding set up and image writing) took 1452ms
Screen - Setting up image as 512 by 512 with debug mode on
Raytracer - Performing inital setup with:
        Camera at vec4(0.000000, 0.000000, 6.000000, 1.000000)
        Camera Space - X:vec3(1.000000, -0.000000, 0.000000)
        Camera Space - Y:vec3(0.000000, 1.000000, 0.000000)
        Camera Space - Z:vec3(0.000000, 0.000000, -1.000000)

        View Plane center at: vec3(0.000000, 0.000000, 5.000000)
        View Plane upper left at: vec3(-1.000000, 1.000000, 5.000000)

starting raytrace of scene......
Raytracer - tracing took 1452ms
Screen - Writing 262144 pixels to 512 by 512 file: traced_image.png
Teapot

This teapot and sphere is in the same resolution as the previous image and took 64542ms
Screen - Setting up image as 512 by 512 with debug mode on
Raytracer - Performing inital setup with:
        Camera at vec4(0.000000, 0.000000, 6.000000, 1.000000)
        Camera Space - X:vec3(1.000000, -0.000000, 0.000000)
        Camera Space - Y:vec3(0.000000, 1.000000, 0.000000)
        Camera Space - Z:vec3(0.000000, 0.000000, -1.000000)

        View Plane center at: vec3(0.000000, 0.000000, 5.000000)
        View Plane upper left at: vec3(-1.000000, 1.000000, 5.000000)

starting raytrace of scene......
Raytracer - tracing took 64542ms
Screen - Writing 262144 pixels to 512 by 512 file: teapot.png
….A blob?
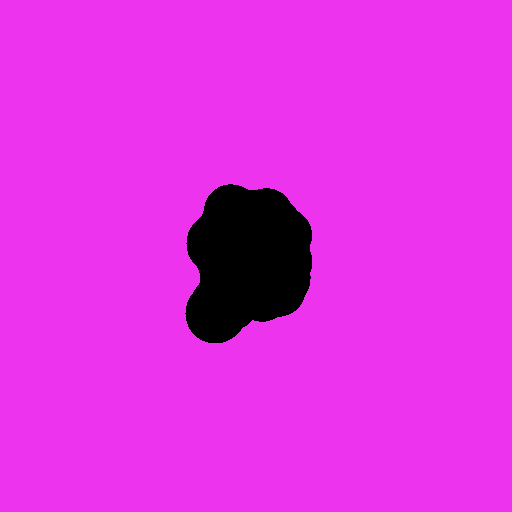
This is the model listed as “molecule” on the website and penny3.smf in the file description. Same resolution as above, 83251ms.
Screen - Setting up image as 512 by 512 with debug mode on
Raytracer - Performing inital setup with:
        Camera at vec4(0.000000, 0.000000, 6.000000, 1.000000)
        Camera Space - X:vec3(1.000000, -0.000000, 0.000000)
        Camera Space - Y:vec3(0.000000, 1.000000, 0.000000)
        Camera Space - Z:vec3(0.000000, 0.000000, -1.000000)

        View Plane center at: vec3(0.000000, 0.000000, 5.000000)
        View Plane upper left at: vec3(-1.000000, 1.000000, 5.000000)

starting raytrace of scene......
Raytracer - tracing took 83251ms
Screen - Writing 262144 pixels to 512 by 512 file: penny3.png
Additional images from the development process
Here are some of the other images I generated along the way.

The first thing I brought online was image writing. I had worked with stb_image_write.h in the past, however I needed to make sure that the library worked the way I thought it did. A quick image generated with pixels colored black if x == y let me feel out how the library would integrate with the rest of the program. It also enabled me to have a visual debugging tool, while the builtin Visual Studio Debugger is handy for lots of things, Viewing pixel information is not a forte of the tool, having a visual peek into what was going on would be a much better indicator of success or failure.

I’m still not entirely sure what created this smeared sphere image. It went away when I broke the logic for generating rays out from a one-liner into multiple statements. This can be found staring at line 83 in src/raytracer.cpp

This was the first success, a sphere, at the origin. The first raytraced image!

This was a quick diversion into some old coursework from CS 536, While not strictly a required feature of this homework, being able to apply transformations to meshes seemed like a good idea. To that end I grabbed some of my code from the hierarchical robot project to enable me to scale and rotate my meshes. I also brought over the code for translations, however I had some issues getting it to work. Hopefully I’ll have that fixed before the next assignment.