Adaptive Supersampiling and Anti-Aliasing
May 2020 (2804 Words, 16 Minutes)
The goal of this assignment was twofold. Firstly, we wanted to removed aliasing artifacts or “jaggies” from our ray traced images, much like assignment 2’s work. However the second goal was that we wanted to avoid having to cast the x4 number of rays used by the naive super sampling we implemented previously.
To do this, we needed to introduce two new pieces of functionality to our ray tracer. The first, “Suffern-style” adaptive super sampling, and the second, a way of tracking previously shot rays.
Suffern Supersampling with Two Levels of Subdivision
Right off the bat, we make an assumption. Since we are only concerned with two levels of subdivision, we can calculate a worst-case scenario. At most, a single pixel will require 25 points of data. We tried several methods for caching this information, and managed to get very close using a map, with the image plane coordinates serving as the look up key, however due to float inconsistencies we were experiencing a larger than acceptable number of cache misses. Meaning we shot redundant primary rays. So we instead used a somewhat brute force approach.
We introduced a new structure called a Fragment, that was simply a container for 25 points of data, representing the color returned from a successful ray shoot and shade operation. This lives in the raytracer.h header on line 37.
struct Fragment {
    glm::vec3 subsamples[25] = { {0.0, 0.0, 0.0} };
};
Then, we create a map of these Fragment objects, correlated to the x and y positions of that fragment’s pixel.
std::unordered_map<std::pair<int, int>, Fragment, pair_hash> fragmentCache;pair_hash is a hashing function so we can use the coordinate pairs as keys in an unordered map. Its implementation is on line 23 of raytracer.cpp
Now armed with this cache, at each pixel we can check to see if we have processed the pixel above, and the pixel to the left of our current address, and recycle any samples we have taken along the shared borders, the following code is part of the main render loop starting at line 242 in raytracer.cpp.
Fragment currFrag;
bool rayTraceTop = true;
bool rayTraceLeft = true;

//look for pixel above, reuse any sub samples on the shared border
if (fragmentCache.find(std::make_pair(hh, vv - 1)) != fragmentCache.end()) {
    Fragment above = fragmentCache.at(std::make_pair(hh, vv - 1));

    currFrag.subsamples[0] = above.subsamples[20];
    currFrag.subsamples[1] = above.subsamples[21];
    currFrag.subsamples[2] = above.subsamples[22];
    currFrag.subsamples[3] = above.subsamples[23];
    currFrag.subsamples[4] = above.subsamples[24];

    rayTraceTop = false; // we dont need to re-shoot A - B
}

//look for pixel to the left, reuse any sub samples on the shared border
if (fragmentCache.find(std::make_pair(hh - 1, vv)) != fragmentCache.end()) {
    Fragment left = fragmentCache.at(std::make_pair(hh - 1, vv));

    currFrag.subsamples[0] = left.subsamples[4];
    currFrag.subsamples[5] = left.subsamples[9];
    currFrag.subsamples[10] = left.subsamples[14];
    currFrag.subsamples[15] = left.subsamples[19];
    currFrag.subsamples[20] = left.subsamples[24];

    rayTraceLeft = false; // we dont need to re-shoot A - C
}
Then, we get the corners we still need, based on what we were not able to find in the cache. Since we will never have a right or lower pixel already solved, we assume that we will always need to shoot a ray at D.
// now shoot the rays needed for the basic fragment
if (rayTraceLeft && rayTraceTop) {
    // shoot A
    ShootAndShadePrimaryRay(BuildRay(origin, imagePlaneCoordA), sceneObjects, currFrag.subsamples[0]);
    ++raysThisPixel;
}

if (rayTraceTop) {
    // shoot B
    ShootAndShadePrimaryRay(BuildRay(origin, imagePlaneCoordB), sceneObjects, currFrag.subsamples[4]);
    ++raysThisPixel;
}

if (rayTraceLeft) {
    // shoot C
    ShootAndShadePrimaryRay(BuildRay(origin, imagePlaneCoordC), sceneObjects, currFrag.subsamples[20]);
    ++raysThisPixel;
}

// Always shoot D
ShootAndShadePrimaryRay(BuildRay(origin, imagePlaneCoordD), sceneObjects, currFrag.subsamples[24]);
++raysThisPixel;
Finally, we check on the results of the rays we just shot and see if they are within our arbitrary tolerance. If they are within in tolerance, we just do a simple average to determine the overall pixel color. If they are out of tolerance, we start a recursive subdivision. Once all that is over with, we log all our results: fragment samples, number of rays in this pixel, etc.
//check tolerances
if (!FragmentInTolerance(currFrag.subsamples[0], currFrag.subsamples[4],
     currFrag.subsamples[20], currFrag.subsamples[24], tolerance)) {
    //recurse into sub fragments
    raysThisPixel += SubfragmentRecurse(currFrag,0,imagePlaneCoordA,4,
         imagePlaneCoordB,20, imagePlaneCoordC ,24, imagePlaneCoordD,
         origin,sceneObjects, image[index], rayTraceTop, rayTraceLeft,
         false, tolerance);
}
else {
    image[index] = (currFrag.subsamples[0] + currFrag.subsamples[4] +
                  currFrag.subsamples[20] + currFrag.subsamples[24]) / 4;
}

fragmentCache.emplace(std::make_pair(hh, vv), currFrag); // cache this fragment for the next one
perPixelRayCount[index] = raysThisPixel;
primaryRayCounter += raysThisPixel;
maxRaysPerPixel = std::max(maxRaysPerPixel, raysThisPixel);
The subdivision and subsequent super-sampling work happens in RayTracer::SubfragmentRecurse on line 97 of raytracer.cpp. Sadly, it has a rather monstrous signature:
int SubfragmentRecurse(Fragment frag,
                      int A, glm::vec3 imgPlaneA,
                      int B, glm::vec3 imgPlaneB,
                      int C, glm::vec3 imgPlaneC,
                      int D, glm::vec3 imgPlaneD,
                      glm::vec3 origin ,
                      std::vector<Intersectable*> sceneObjects,
                      glm::vec3& outColor,
                      bool skipTop, bool skipLeft,
                      bool stop, float tolerance);
We need all of this info. Here is the quick overview. the int, glm::vec3 pairs are the index and the image plane coordinates for our 4 corners. origin is the origin for our rays, sceneObjects is self explanatory, as is outColor. The bools are passed down from to tell us that we don’t need to re shoot the leftmost or topmost edge, because they have been solved previously, stop is how we control our recursion and keep it at only 2 levels, and tolerance is our arbitrary color tolerance value.
Then, the body of this function should look somewhat similar to the first set of raytracing we have done.
int shotRays = 0;
//compute midpoints along edges, and dead center
glm::vec3 topMid = (imgPlaneA + imgPlaneB) / 2;
glm::vec3 bottomMid = (imgPlaneC + imgPlaneD) / 2;
glm::vec3 leftMid = (imgPlaneA + imgPlaneC) / 2;
glm::vec3 rightMid = (imgPlaneB + imgPlaneD) / 2;

//compute indexes for midpoints
int topIndex = (A + B) / 2;
int bottomIndex = (C + D) / 2;
int leftIndex = (A + C) / 2;
int rightIndex = (B + D) / 2;

glm::vec3 center = (imgPlaneA + imgPlaneB + imgPlaneC + imgPlaneD) / 4;
int centerIndex = (A + D) / 2;

if (!skipTop) {
    Ray t = BuildRay(origin, topMid);
    ShootAndShadePrimaryRay(t, sceneObjects, frag.subsamples[topIndex]);
    ++shotRays;
}

if (!skipLeft) {
    Ray l = BuildRay(origin, leftMid);
    ShootAndShadePrimaryRay(l, sceneObjects, frag.subsamples[leftIndex]);
    ++shotRays;
}

ShootAndShadePrimaryRay(BuildRay(origin, rightMid), sceneObjects, frag.subsamples[rightIndex]);
ShootAndShadePrimaryRay(BuildRay(origin, bottomMid), sceneObjects, frag.subsamples[bottomIndex]);
ShootAndShadePrimaryRay(BuildRay(origin, center), sceneObjects, frag.subsamples[centerIndex]);
shotRays += 3;

auto s = frag.subsamples;

glm::vec3 upperLeftColor = (s[A] + s[topIndex] + s[centerIndex] + s[leftIndex]) /4;
glm::vec3 upperRightColor = (s[B] + s[topIndex] + s[centerIndex] + s[rightIndex])/4;
glm::vec3 lowerLeftColor = (s[C] + s[bottomIndex] + s[centerIndex] + s[leftIndex])/4;
glm::vec3 lowerRightColor = (s[D] + s[bottomIndex] + s[centerIndex] + s[rightIndex])/4;

if (!FragmentInTolerance(s[A], s[topIndex], s[centerIndex], s[leftIndex], tolerance) && !stop) {
    shotRays += SubfragmentRecurse(frag, A, imgPlaneA, topIndex, topMid, leftIndex, leftMid, centerIndex,
    center, origin, sceneObjects, upperLeftColor, skipTop, skipLeft, true, tolerance);
}

if (!FragmentInTolerance(s[B], s[topIndex] , s[centerIndex] , s[rightIndex], tolerance) && !stop) {
    shotRays += SubfragmentRecurse(frag, topIndex, topMid, B, imgPlaneB, centerIndex, center, rightIndex,
    rightMid, origin, sceneObjects, upperRightColor, skipTop, false, true, tolerance);
}

if (!FragmentInTolerance(s[C] , s[bottomIndex] , s[centerIndex] , s[leftIndex], tolerance) && !stop) {
    shotRays += SubfragmentRecurse(frag, leftIndex, leftMid, centerIndex, center, C, imgPlaneC, bottomIndex,
    bottomMid, origin, sceneObjects, lowerLeftColor, skipTop, skipLeft, true, tolerance);
}

if (!FragmentInTolerance(s[D], s[bottomIndex] , s[centerIndex] , s[rightIndex], tolerance) && !stop) {
    shotRays += SubfragmentRecurse(frag, centerIndex, center, rightIndex, rightMid, bottomIndex, bottomMid,
    D, imgPlaneD, origin, sceneObjects, lowerRightColor, true, true, true, tolerance);
}

outColor = (upperLeftColor + upperRightColor + lowerLeftColor + lowerRightColor) / 4;

return shotRays;
Images and Analysis
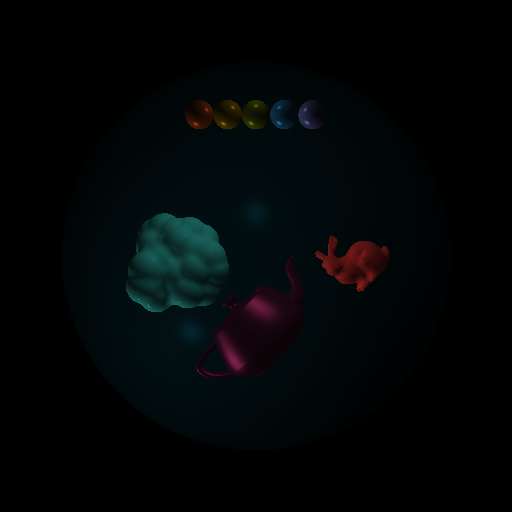
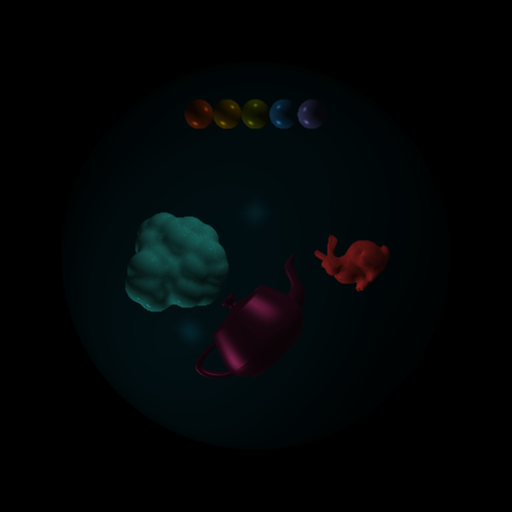
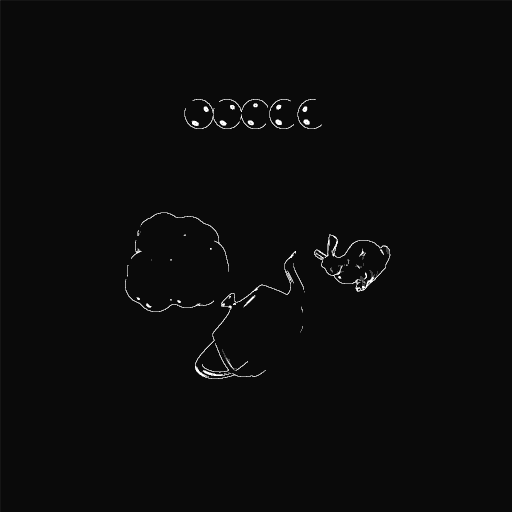
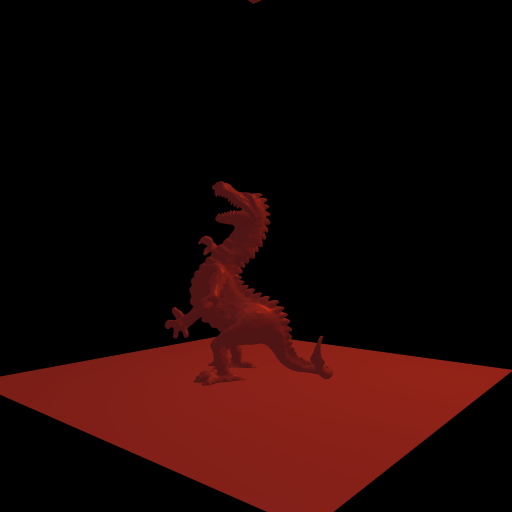
Lets look at one of our familiar scenes, in its raw, jagged glory.
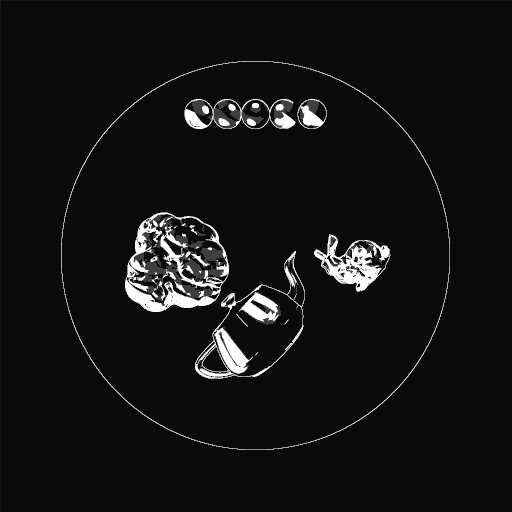
And now with our old HW2 Supersampling

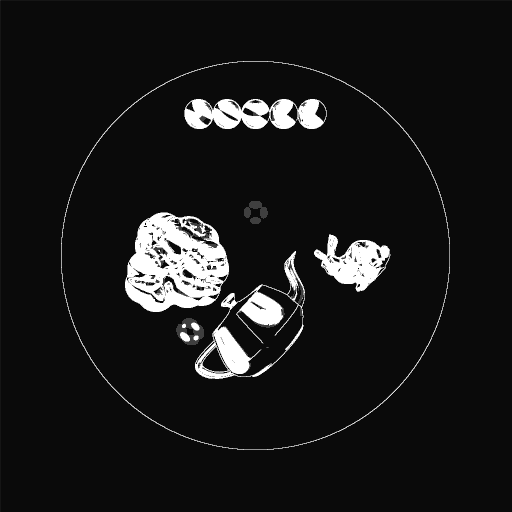
And finally with the new Suffern super-sampling with two levels of subdivision.
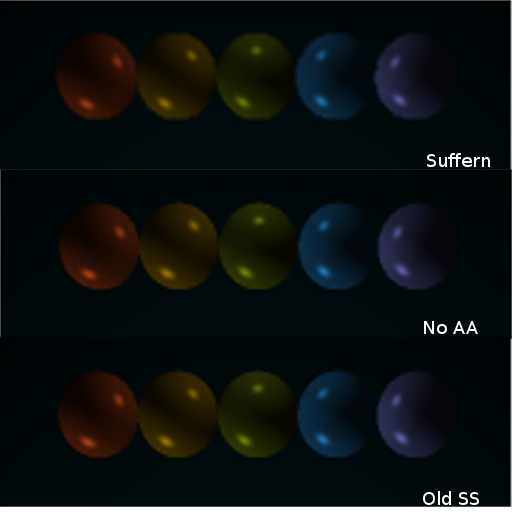
Lets do a side by side comparison of certain regions of the image, just so we can see whats going on. Spheres look almost identical, however in the no AA and old SS images you can see a bit of an extra ridge ontop of some of the spheres.
 looking at mesh edges gives a bit more variety
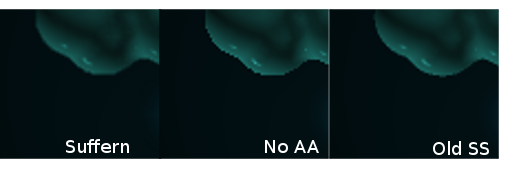 The quality between our properly super-sampled images is comparable, both are a marked improvement over no AA at all. Where things are different however, is in the work we had to do.
| AA Method | Primary Rays | Total Render Time |
|---|---|---|
| None | 262144 | 132ms |
| Naive Supersampiling | 1085764 | 507ms |
| Adaptive Supersampling | 301149 | 382ms |
in this example we used a threshold of 0.05 for the adaptive super-sampling. changing the threshold can increase or decrease the ray count and render time.
In fact, lets look at the work being done at different thresholds.
| Threshold | Primary Rays | Total Render Time |
|---|---|---|
| 0.05 | 301149 | 382ms |
| 0.01 | 492579 | 784ms |
| 0.005 | 628871 | 1032ms |
| 0.001 | 803009 | 1260ms |
And then we can look at a sort of “heat map” of where in the image we had to generate more rays per pixel. As the pixel approaches white, there are more rays being cast. Here, the images, correspond to the order of thresholds as listed in the table above.
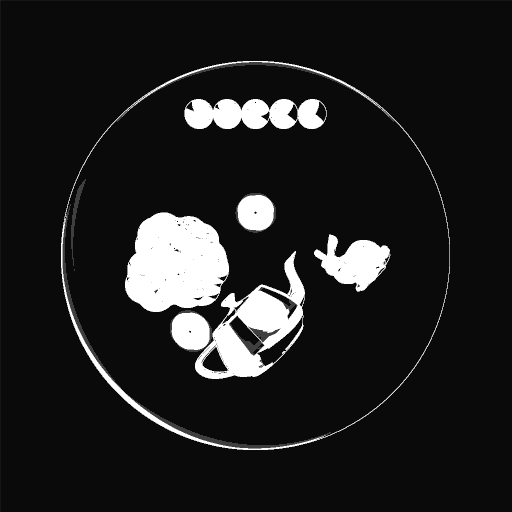
The intresting, yet obvious conclusion we can draw is that the areas where more “is going on” in terms of overlapping objects or spectra changes from lights, causes more subsampiling.
Other Scenes
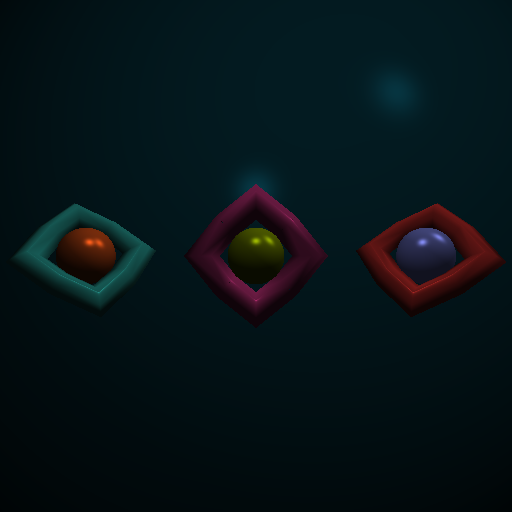
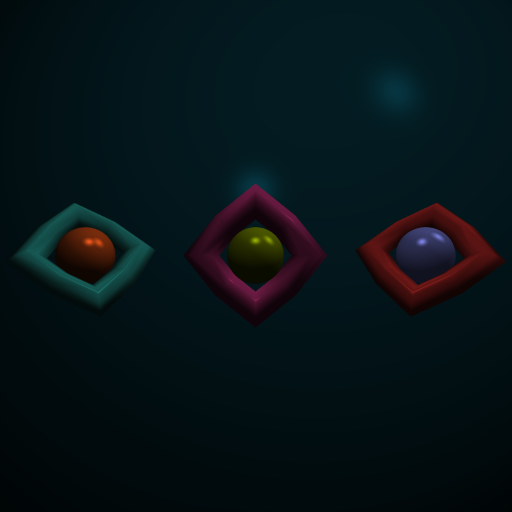
Here are a few more images, reflective of non-aa vs supersampled images, both of these are done with a tolerance of 0.001;

| Primary Rays | Total Render Time |
|---|---|
| 422777 | 1059ms |
| Primary Rays | Total Render Time |
|---|---|
| 596855 | 864ms |